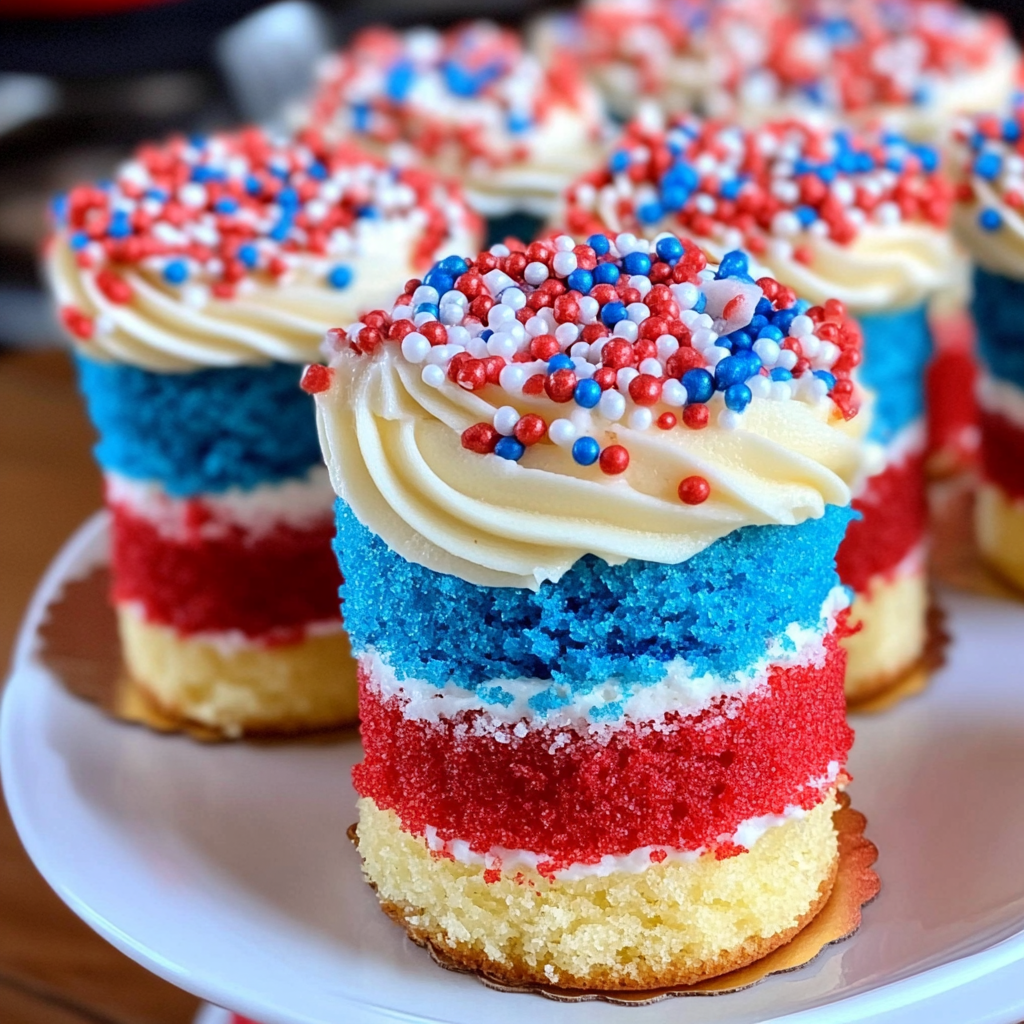
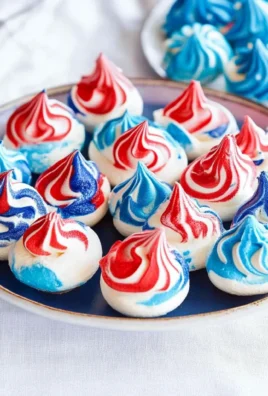
These Red, White, and Blue Mini Cakes are a delightful treat for all your summer gatherings! Their vibrant colors make them the perfect centerpiece for BBQs and festive occasions like the 4th of July or Memorial Day. Each mini cake is layered with delicious frosting and topped with patriotic sprinkles, making them not only tasty but also visually appealing. Whether you’re celebrating with family or hosting friends, these mini cakes will surely impress everyone.
Why You’ll Love This Recipe
- Easy to Make: With a simple vanilla cake mix as a base, preparation is quick and straightforward.
- Festive Appeal: The red, white, and blue colors make these cakes ideal for patriotic holidays.
- Customizable: You can adjust the flavors or colors to suit any occasion or personal preference.
- Perfect Portion Size: Mini cakes offer just the right amount of dessert without overwhelming your guests.
- Fun to Decorate: Kids and adults alike will enjoy adding sprinkles and frosting to their creations.
Tools and Preparation
Before diving into this fun baking experience, gather your tools. Having everything ready will make the process smoother.
Essential Tools and Equipment
- nonstick spray
- 9-inch cake pans (3)
- mixing bowls (3)
- whisk or mixer
- 2.5-inch circle cutter
- wire rack
Importance of Each Tool
- Nonstick Spray: Ensures easy removal of baked cakes from pans without sticking.
- 9-Inch Cake Pans: The perfect size for baking layers that are easy to cut into mini cakes.
- Wire Rack: Allows for proper cooling of cakes, preventing sogginess.
Ingredients
These Red, White, and Blue Mini Cakes are perfect for all your summer parties and BBQs!
For the Cake
- nonstick spray
- flour
- 1 box vanilla cake mix (plus ingredients to prepare mix: eggs, oil, etc.)
- red and blue food coloring
For the Frosting
- 2 containers vanilla or white frosting
For Decoration
- red, white, and blue sprinkles
How to Make Red, White, and Blue Mini Cakes
Step 1: Preheat the Oven
Preheat your oven to 350 degrees Fahrenheit to ensure it reaches the right temperature before baking.
Step 2: Prepare Your Cake Pans
Spray three 9-inch cake pans with nonstick spray. Lightly coat them with flour to prevent sticking.
Step 3: Mix the Cake Batter
Prepare the vanilla cake mix according to package directions. For a whiter appearance, use egg whites instead of whole eggs.
Step 4: Divide the Batter
Measure out the batter and divide it evenly into three different bowls.
Step 5: Color the Batter
Add red food coloring to one bowl and blue food coloring to another. Leave one bowl as is for the white layer.
Step 6: Bake the Cake Layers
Transfer each colored batter into its prepared cake pan. Bake in the preheated oven until a toothpick inserted in the center comes out clean—this should take about 10 to 12 minutes.
Step 7: Cool the Cakes
Once baked, let them cool slightly. Carefully remove each layer from its pan and place them on a wire rack to cool completely before frosting.
Step 8: Cut Out Cake Circles
Using a 2.5-inch circle cutter, cut each layer into seven circles. If necessary, trim any domed tops off using a serrated knife.
Step 9: Layer with Frosting
Take one blue circle and cover it generously with frosting. Add a white circle on top followed by more frosting. Finish with a red circle on top plus additional frosting.
Step 10: Smooth Out Frosting
Use the flat side of a knife to carefully remove any excess frosting from around the sides of your mini cakes.
Step 11: Repeat Layering Process
Repeat this layering process with all remaining cake circles until you have assembled all seven mini cakes.
Step 12: Add Sprinkles for Decoration
Top each mini cake generously with red, white, and blue sprinkles for that perfect festive touch.
Serve these delightful Red, White, and Blue Mini Cakes immediately or store them in a cool place until you’re ready to enjoy!
How to Serve Red, White, and Blue Mini Cakes
These delightful Red, White, and Blue Mini Cakes are not only visually stunning but also versatile in their presentation. They make a festive addition to any summer gathering or celebration. Here are some fun serving suggestions to elevate your dessert experience.
Individual Dessert Plates
- Serve each mini cake on its own plate for a personal touch. This allows guests to enjoy their cake without sharing.
Cake Stands
- Display the mini cakes on tiered cake stands for an eye-catching centerpiece. This adds height and elegance to your dessert table.
Picnic Style
- Arrange the cakes on a large platter and serve them at outdoor events. Perfect for BBQs and picnics, they can be easily picked up and enjoyed.
Party Favors
- Package individual mini cakes in clear bags tied with patriotic ribbon. This makes for charming party favors that guests can take home.
Ice Cream Pairing
- Serve the mini cakes alongside a scoop of vanilla ice cream. The creamy texture complements the fluffy cake perfectly.
Decorative Garnishes
- Add fresh berries or mint leaves around each mini cake on the serving plate for an extra pop of color and flavor.
How to Perfect Red, White, and Blue Mini Cakes
Perfecting your Red, White, and Blue Mini Cakes will ensure they impress at any gathering. Here are essential tips for achieving the best results.
- Use Room Temperature Ingredients: Ensure that your eggs and other ingredients are at room temperature before mixing. This helps create a smoother batter.
- Sift Dry Ingredients: Sifting flour before measuring helps avoid lumps in your batter, resulting in a fluffier cake.
- Monitor Baking Time: Keep an eye on the cakes while baking. Ovens vary, so check for doneness a minute or two early.
- Cool Completely Before Frosting: Let the cakes cool fully before icing them. Frosting on warm cakes can melt and slide off.
- Experiment with Colors: Don’t hesitate to mix different shades of red and blue for a more vibrant look. This adds dimension to your mini cakes.
- Practice Frosting Techniques: Use a bench scraper or offset spatula for smooth frosting sides. A little practice goes a long way in making your cakes look professional.

Best Side Dishes for Red, White, and Blue Mini Cakes
Pairing side dishes with Red, White, and Blue Mini Cakes enhances your meal experience. Here are some great options to consider:
- Fresh Fruit Salad: A mix of seasonal fruits provides a refreshing contrast to the sweetness of the mini cakes.
- Grilled Corn on the Cob: Sweet corn complements desserts well; add butter and herbs for extra flavor.
- Classic Coleslaw: The crunchiness of coleslaw balances out the soft texture of the mini cakes.
- Potato Salad: A creamy potato salad is always a crowd-pleaser at summer gatherings.
- Caprese Skewers: Fresh mozzarella and tomatoes drizzled with balsamic offer a savory note between bites of cake.
- Veggie Platter: Raw vegetables with dip provide a healthy crunch that contrasts nicely with sweet desserts.
- Cheese Board: A variety of cheeses paired with crackers creates an elegant touch that pairs well with sweets.
- Grilled Chicken Skewers: Savory chicken skewers bring protein to your meal while complementing the festive spirit of your mini cakes.
Common Mistakes to Avoid
Making Red, White, and Blue Mini Cakes can be a fun experience, but there are some common mistakes to watch out for.
- Not preparing your pans correctly: Always spray the cake pans with nonstick spray and lightly coat them with flour. This ensures easy removal of the cakes after baking.
- Incorrectly measuring ingredients: Be sure to follow the package instructions carefully when preparing the cake mix. Accurate measurements lead to the best texture and flavor.
- Using whole eggs instead of egg whites: For a lighter and whiter cake, use egg whites. Whole eggs can affect the color and texture of your mini cakes.
- Overbaking the cakes: Keep an eye on your cakes as they bake. They only need about 10 to 12 minutes. Insert a toothpick to check for doneness; it should come out clean.
- Skipping cooling time: Letting your cakes cool completely before frosting is crucial. If they’re still warm, the frosting will melt off, ruining their appearance.
Storage & Reheating Instructions
Refrigerator Storage
- Store the mini cakes in an airtight container.
- They can last in the refrigerator for up to 3 days.
Freezing Red, White, and Blue Mini Cakes
- Wrap each mini cake individually in plastic wrap.
- Place wrapped cakes in a freezer-safe container for up to 2 months.
Reheating Red, White, and Blue Mini Cakes
- Oven: Preheat to 350°F. Place cakes on a baking sheet for about 5-7 minutes until warmed through.
- Microwave: Heat individual mini cakes on a microwave-safe plate for 10-15 seconds at a time until warm.
- Stovetop: Use a skillet on low heat. Cover with a lid and warm for about 5 minutes or until heated through.

Frequently Asked Questions
How do I make Red, White, and Blue Mini Cakes more festive?
You can add decorative elements like edible glitter or themed cake toppers that match your event’s color scheme.
Can I customize the flavors?
Absolutely! Try adding different extracts such as almond or lemon for unique flavors in your cake batter.
What if I can’t find red and blue food coloring?
You can mix pink and blue food coloring or use natural options like beet juice for red and blueberries for blue.
How long do these mini cakes stay fresh?
When stored properly in an airtight container in the fridge, they will remain fresh for up to 3 days.
Can I make these mini cakes ahead of time?
Yes! You can bake them a day or two in advance and store them in the refrigerator until ready to frost and serve.
Final Thoughts
These Red, White, and Blue Mini Cakes are not only visually stunning but also deliciously versatile. Perfect for summer gatherings or patriotic celebrations, you can customize them with different flavors or decorations to suit any occasion. Give this recipe a try; it’s sure to impress your guests!
Red, White, and Blue Mini Cakes
These Red, White, and Blue Mini Cakes are the ultimate summer dessert, perfect for BBQs, 4th of July celebrations, or any festive gathering. With their eye-catching colors and delightful layers of fluffy vanilla cake and creamy frosting, these mini cakes are as delicious as they are visually appealing. Easy to make with a simple cake mix base, you can customize them with different flavors or sprinkles to match any occasion. Each mini cake is just the right size for individual servings, ensuring your guests enjoy a sweet treat without feeling overwhelmed. Get ready to impress friends and family with this fun and festive dessert that brings joy to every celebration!
- Prep Time: 20 minutes
- Cook Time: 30 minutes
- Total Time: 50 minutes
- Yield: Approximately 21 mini cakes 1x
- Category: Dessert
- Method: Baking
- Cuisine: American
Ingredients
- nonstick spray
- 1 box vanilla cake mix (plus ingredients to prepare mix: eggs, oil, etc.)
- red and blue food coloring
- 2 containers vanilla or white frosting
- red, white, and blue sprinkles
Instructions
- Preheat your oven to 350°F.
- Spray three 9-inch cake pans with nonstick spray and lightly coat with flour.
- Prepare the cake mix according to package instructions.
- Divide the batter into three bowls; color one red, another blue, and leave one plain.
- Bake each layer in the prepared pans for 10-12 minutes until a toothpick comes out clean.
- Cool completely on a wire rack before frosting.
- Use a 2.5-inch circle cutter to cut each layer into circles.
- Layer the colored circles with frosting in between each layer.
- Top with red, white, and blue sprinkles.
Nutrition
- Serving Size: 1 mini cake (50g)
- Calories: 180
- Sugar: 15g
- Sodium: 180mg
- Fat: 7g
- Saturated Fat: 2g
- Unsaturated Fat: 4g
- Trans Fat: 0g
- Carbohydrates: 26g
- Fiber: 0g
- Protein: 2g
- Cholesterol: 25mg
Leave a Comment