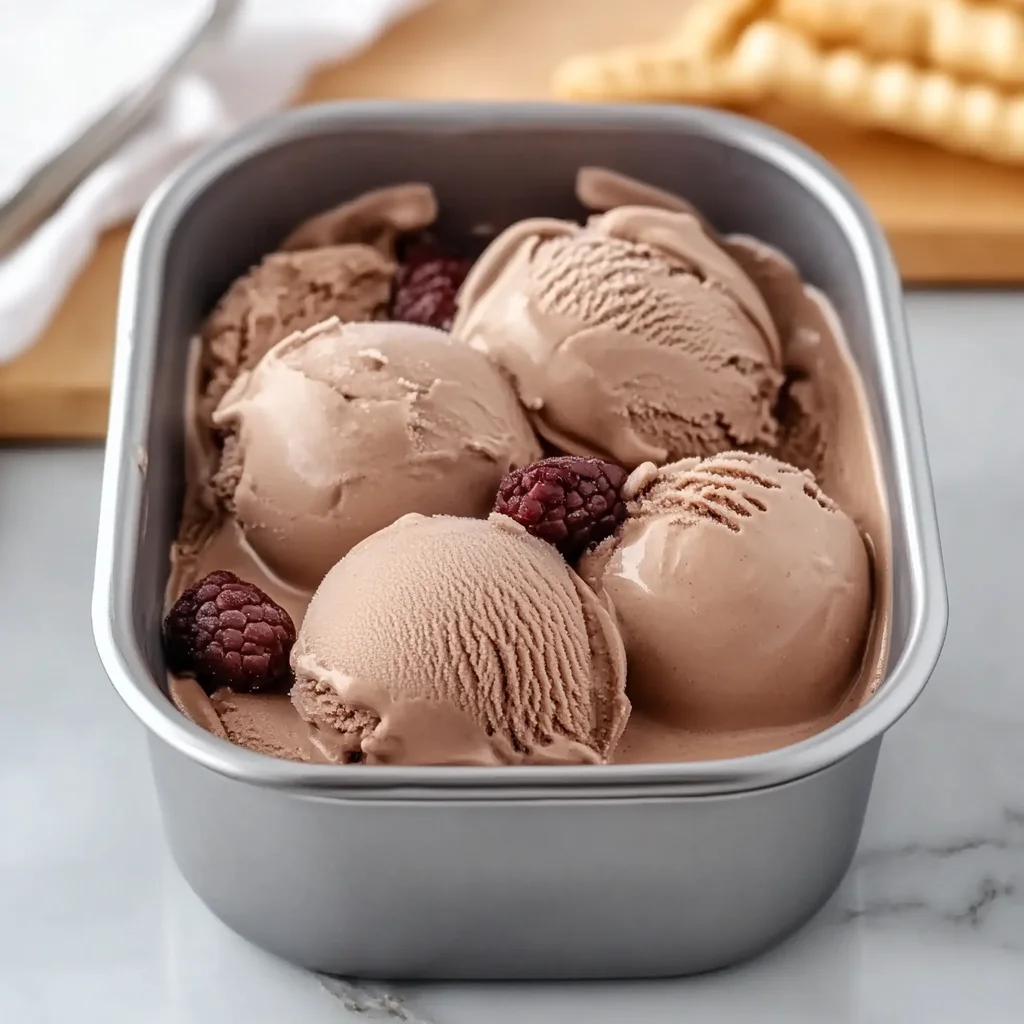
Here is my take on Dairy-Free Chickpea Ice Cream, a creamy, dairy-free frozen treat that uses simple pantry ingredients and comes together in just minutes. Perfect for warm days or special occasions, this unique ice cream is not only delicious but also nutritious. Enjoy it as a guilt-free dessert, a refreshing snack, or a fun treat for family gatherings.
Why You’ll Love This Recipe
- Easy to Make: This chickpea ice cream comes together quickly with minimal effort. Just blend and freeze!
- Nutritious Ingredients: Packed with protein from chickpeas and healthy fats from sunflower seed butter, it’s a treat you can feel good about.
- Versatile Flavor Options: Customize it by adding your favorite mix-ins or toppings, such as nuts, fruits, or more chocolate.
- Dairy-Free Delight: Ideal for those with lactose intolerance or anyone following a vegan lifestyle.
- Kid-Friendly: Kids will love the creamy texture and rich flavor, making it a perfect way to sneak in some extra nutrition.
Tools and Preparation
To make this delicious dairy-free chickpea ice cream, you’ll need a few essential tools. Having the right equipment makes the process smooth and enjoyable.
Essential Tools and Equipment
- A high-speed blender
- Measuring cups and spoons
- Ice cream maker (optional)
- Mixing bowl
Importance of Each Tool
- High-speed blender: Ensures all ingredients are smoothly combined for a creamy texture.
- Ice cream maker (optional): Churns the mixture to create a fluffier ice cream, but you can also freeze without one.
Ingredients
For the Ice Cream Base
- 2 cups plain unsweetened plant-based milk like soy or oat (I used soy)
- 1/4 cup cocoa powder
- 2 tablespoons corn starch (or arrowroot powder)
- 1 cup cooked chickpeas, rinsed and drained
- Slightly less than 1/2 cup organic cane sugar
- Just under 1/3 cup salted sunflower seed butter
- 2 teaspoons vanilla essence
- 1/2 teaspoon fine sea salt (add a pinch more salt if using unsalted seed or nut butter)
- 7 ounces dairy-free chocolate (about 60 to 65% cocoa solids)
For Garnish
- 2 tablespoons fresh parsley, finely chopped
How to Make Dairy-Free Chickpea Ice Cream
Step 1: Prepare Your Ingredients
Start by gathering all your ingredients. Make sure your chickpeas are cooked and rinsed well to ensure they blend smoothly.
Step 2: Blend the Base
In your high-speed blender, combine the following ingredients:
1. Plant-based milk
2. Cocoa powder
3. Corn starch (or arrowroot powder)
4. Cooked chickpeas
5. Organic cane sugar
6. Sunflower seed butter
7. Vanilla essence
8. Sea salt
Blend until completely smooth.
Step 3: Melt the Chocolate
In a microwave-safe bowl or double boiler, melt the dairy-free chocolate until smooth. Stir occasionally to avoid burning.
Step 4: Combine Chocolate with Mixture
Once melted, pour the chocolate into the blended mixture in the blender. Blend again until fully incorporated.
Step 5: Freeze
Pour the mixture into an ice cream maker if you have one; follow the manufacturer’s instructions for churning. If not using an ice cream maker, transfer it into a freezer-safe container and freeze for at least 4 hours or until solid.
Enjoy your homemade Dairy-Free Chickpea Ice Cream!
How to Serve Dairy-Free Chickpea Ice Cream
Serving Dairy-Free Chickpea Ice Cream can be a delightful experience, as this creamy treat pairs well with various toppings and accompaniments. Here are some creative serving suggestions to enhance your dessert.
Toppings
- Fresh Fruits: Add sliced bananas, strawberries, or blueberries for a refreshing contrast.
- Nuts and Seeds: Sprinkle chopped almonds or hemp seeds for added crunch and nutrition.
- Coconut Flakes: Toasted coconut flakes bring a tropical flavor that complements the ice cream’s richness.
- Chocolate Drizzle: A drizzle of melted dairy-free chocolate creates a decadent finish.
Sandwich Style
- Ice Cream Sandwiches: Use dairy-free cookies to create delicious ice cream sandwiches for a fun twist.
- Waffle Cones: Scoop the ice cream into waffle cones for an easy-to-eat treat on the go.
Sundae Style
- Classic Sundae: Serve with your favorite dairy-free syrup and whipped cream for an indulgent sundae.
- Layered Parfait: Alternate layers of ice cream with granola and fruits in a glass for a beautiful parfait.
How to Perfect Dairy-Free Chickpea Ice Cream
To achieve the perfect texture and flavor in your Dairy-Free Chickpea Ice Cream, consider these helpful tips.
- Use Cold Ingredients: Start with chilled plant-based milk and ingredients to ensure smoother blending.
- Blend Thoroughly: Make sure all ingredients are blended until completely smooth for a creamy texture.
- Freeze Properly: Allow the mixture to freeze adequately; stirring every 30 minutes helps prevent ice crystals.
- Taste and Adjust Sweetness: Always taste the mixture before freezing, adding more sugar if desired.
Best Side Dishes for Dairy-Free Chickpea Ice Cream
Pairing side dishes with your Dairy-Free Chickpea Ice Cream can elevate your dessert experience. Here are some tasty options that complement its unique flavors.
- Fruit Salad: A colorful mix of seasonal fruits adds brightness and freshness to your meal.
- Nut Butter Toast: Whole grain toast topped with almond or sunflower seed butter makes a hearty side.
- Granola Bars: Chewy granola bars provide a satisfying crunch that pairs well with creamy ice cream.
- Chia Seed Pudding: This light dessert offers a healthy balance with added fiber and nutrients.
- Rice Cakes with Jam: Light rice cakes spread with fruit jam create a sweet pairing without being heavy.
- Dairy-Free Cookies: Soft, chewy cookies make excellent companions, enhancing the dessert experience.
Common Mistakes to Avoid
Making Dairy-Free Chickpea Ice Cream can be simple, but there are a few common errors that might lead to less than perfect results. Here are some mistakes to avoid:
- Using sweeteners incorrectly – Always measure your sweeteners accurately. Too much sugar can make the ice cream overly sweet, while too little can result in a bland taste.
- Not blending thoroughly – Ensure you blend the mixture until completely smooth. If you have chunks of chickpeas or other ingredients, it will affect the creamy texture of your ice cream.
- Skipping the chilling step – Allow your mixture to chill for at least 30 minutes before freezing. This helps to achieve a better texture and allows flavors to meld together.
- Overcrowding the freezer – Make sure your ice cream container has enough space in the freezer. Overcrowding can lead to uneven freezing and affect the consistency of your ice cream.
- Neglecting flavor variations – Don’t be afraid to experiment! Adding different flavors or mix-ins can enhance your Dairy-Free Chickpea Ice Cream experience. Try adding fruits or spices for a unique twist.
Refrigerator Storage
- Store in an airtight container.
- Keep it in the refrigerator for up to 3 days if not frozen.
Freezing Dairy-Free Chickpea Ice Cream
- Use an airtight container for freezing.
- It can stay frozen for up to 2 weeks.
- Allow it to soften in the fridge for about 10-15 minutes before scooping.
Reheating Dairy-Free Chickpea Ice Cream
- Oven – Preheat to 350°F (175°C) and place it in a heat-safe dish for about 5-10 minutes; this is not typical for ice cream, but useful if you want it soft.
- Microwave – Heat in short bursts of 10-15 seconds, stirring between each burst until desired softness is reached.
- Stovetop – Place in a small saucepan over low heat, stirring constantly until just softened.
Frequently Asked Questions
Can I use different types of plant-based milk for Dairy-Free Chickpea Ice Cream?
Yes, you can use any unsweetened plant-based milk like almond or oat milk. Just ensure it’s non-dairy.
How do I know when my Dairy-Free Chickpea Ice Cream is ready?
Your ice cream should be firm yet scoopable after freezing for several hours. If it’s too hard, let it sit at room temperature for a few minutes before serving.
What are some good mix-ins for Dairy-Free Chickpea Ice Cream?
Consider adding nuts, fruits like berries or bananas, or even dairy-free chocolate chips for extra flavor and texture.
Can I make this ice cream without sugar?
Yes! You can substitute with natural sweeteners like maple syrup or agave nectar, adjusting the amount based on sweetness preference.
How long does Dairy-Free Chickpea Ice Cream last in the freezer?
It can last up to two weeks when stored properly in an airtight container.
Final Thoughts
This Dairy-Free Chickpea Ice Cream recipe is not only delicious but also versatile. With its creamy texture and rich flavor, it’s a fantastic treat that anyone can enjoy. You can easily customize it with different flavors and mix-ins based on personal preferences, making it perfect for any occasion. Give this recipe a try and discover your favorite variations!
Dairy-Free Chickpea Ice Cream
Indulge in the creamy goodness of Dairy-Free Chickpea Ice Cream, a delightful frozen dessert that combines health and flavor. Made from simple pantry staples, this innovative treat offers a rich and satisfying experience without the guilt.
- Prep Time: 10 minutes
- Cook Time: 0 minutes
- Total Time: 10 minutes
- Yield: Approximately 4 servings 1x
- Category: Dessert
- Method: Freezing
- Cuisine: Vegan
Ingredients
- 2 cups plain unsweetened plant-based milk (soy or oat)
- 1/4 cup cocoa powder
- 1/2 cup organic cane sugar
- 1 cup cooked chickpeas
- 1/3 cup salted sunflower seed butter
- 7 ounces dairy-free chocolate
- 2 teaspoons vanilla essence
Instructions
- Gather ingredients and ensure chickpeas are rinsed.
- Blend plant-based milk, cocoa powder, corn starch, chickpeas, sugar, sunflower seed butter, vanilla essence, and sea salt until smooth.
- Melt dairy-free chocolate in the microwave or double boiler.
- Combine melted chocolate with the blended mixture; blend until incorporated.
- Pour into an ice cream maker or a freezer-safe container and freeze for at least 4 hours.
Nutrition
- Serving Size: 1/2 cup (120g)
- Calories: 180
- Sugar: 15g
- Sodium: 130mg
- Fat: 9g
- Saturated Fat: 1g
- Unsaturated Fat: 8g
- Trans Fat: 0g
- Carbohydrates: 23g
- Fiber: 5g
- Protein: 5g
- Cholesterol: 0mg

Leave a Comment