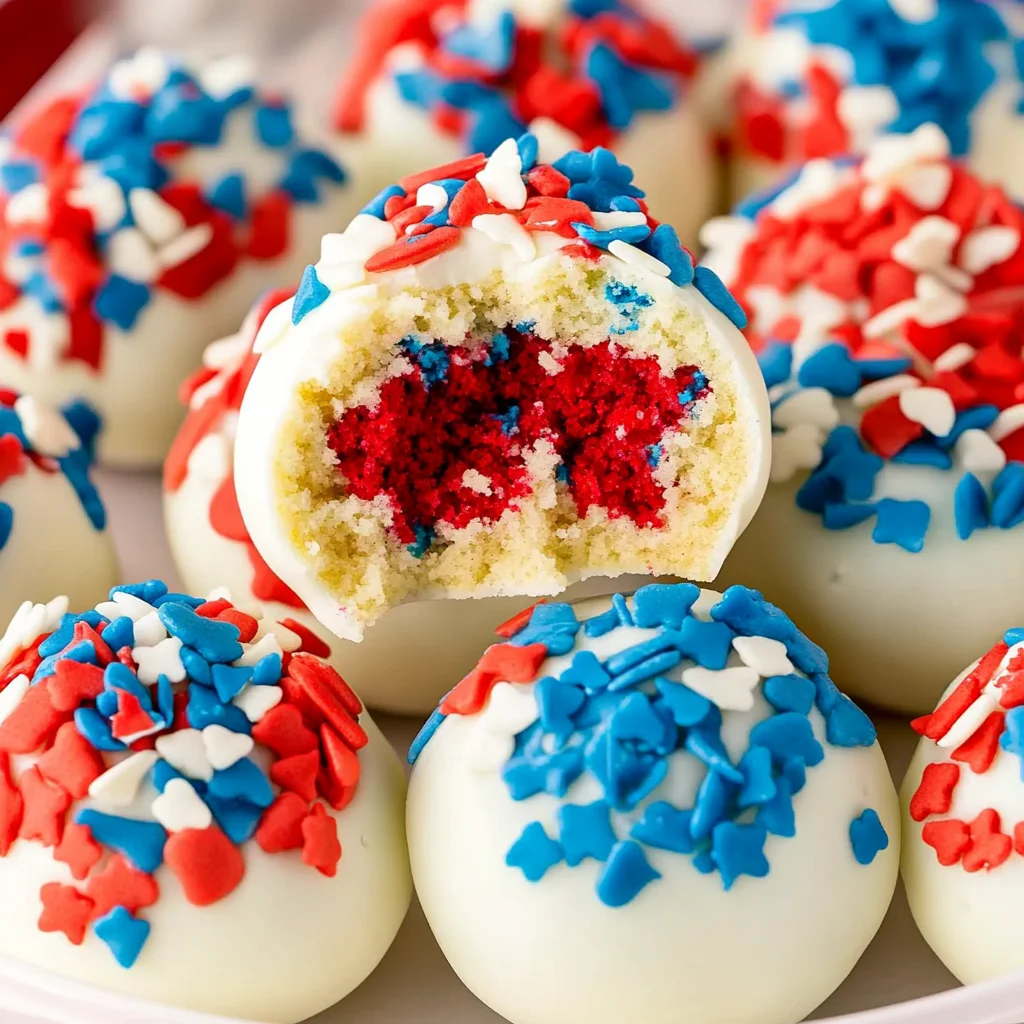
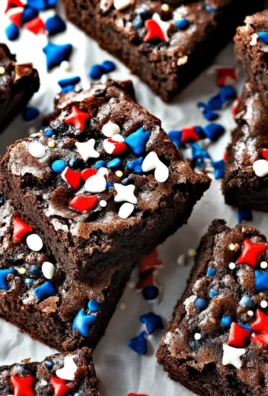
Red, White, and Blue Cake Balls are the perfect festive treat for any celebration. These delightful cake balls are easy to make and visually striking, showcasing vibrant colors that make them suitable for holidays like the Fourth of July or Memorial Day. With a creamy interior and a sweet chocolate coating, these cake balls offer a unique combination of flavors and textures that everyone will love.
Why You’ll Love This Recipe
- Festive Appearance: The red, white, and blue colors create an eye-catching treat that’s ideal for celebrations.
- Easy to Make: Even beginner bakers can follow this simple recipe with ease.
- Versatile Treat: Perfect for parties, potlucks, or family gatherings; they are sure to impress!
- Delicious Flavor: The combination of cream cheese and cake makes each bite rich and satisfying.
- Customizable: Feel free to experiment with different colors or flavors to suit your occasion.
Tools and Preparation
Before you start making your Red, White, and Blue Cake Balls, gather the essential tools for an efficient baking experience.
Essential Tools and Equipment
- Mixing bowls
- Electric mixer
- Baking pans
- Parchment paper
- Microwave-safe bowl
- Fork
Importance of Each Tool
- Mixing bowls: Necessary for combining ingredients easily.
- Electric mixer: Saves time when beating cream cheese until smooth.
- Baking pans: Essential for baking the cake layers evenly.
- Parchment paper: Prevents sticking while cooling and makes cleanup easier.
Ingredients
Ingredients:
– 1 (15.25 ounce) white cake mix, plus ingredients on box needed to make it
– Red and blue food coloring
– 1 (8 ounce) block cream cheese, softened to room temperature
– 1 (10 ounce) package white melting chocolate
– Red, white, and blue sprinkles
How to Make Red, White, and Blue Cake Balls
Step 1: Preheat the Oven
Preheat oven to 350F or at the temperature according to package instructions. Lightly grease 3 small baking pans (I used 8×8) and set aside.
Step 2: Prepare the Cake Batter
In a large mixing bowl, combine the cake mix along with the ingredients needed on the box until well mixed.
Step 3: Color the Batter
Separate the batter into three smaller bowls. Leave one bowl plain and set it aside. Mix red food coloring in the second bowl and blue food coloring in the third bowl, adding 5 drops at a time and mixing until the desired shade is reached.
Step 4: Bake the Cakes
Pour each batter into the prepared baking pans. Bake for 14-16 minutes or until a toothpick inserted in the center comes out clean.
Step 5: Cool Down
Remove the pans from the oven and cool completely on a wire rack.
Step 6: Crumble the Cakes
Once cooled, crumble the cake into smaller pieces and transfer to separate bowls; set aside.
Step 7: Beat Cream Cheese
In a separate mixing bowl using a hand mixer on medium-high speed, beat the cream cheese until smooth and creamy.
Step 8: Combine Mixtures
Divide the cream cheese evenly into 3 crumbled cake bowls. Mix each bowl together until fully incorporated. The easiest way is with an electric mixer but you can do it by hand. If you use an electric mixer, make sure to wash it between each color.
Step 9: Prepare Baking Trays
Line two baking trays with parchment paper.
Step 10: Form Cake Balls
Break off small one-inch chunks from each of the 3 cakes. Roll the colors together with your hands to make a ball. Place each ball onto the prepared baking trays.
Step 11: Chill Cake Balls
Once all of the cake balls have been made, place the trays in the refrigerator for 1-2 hours. This will ensure they hold their shape while dipping.
Step 12: Melt Chocolate
Place chocolate in a microwave-safe bowl. Microwave in 30-second increments, stirring after each one until melted and smooth.
Step 13: Dip Cake Balls
Place one cake ball at a time on a fork and dip it into the melted chocolate. Tap the fork to remove excess chocolate then place back onto baking tray. Repeat with remaining cake balls.
Step 14: Decorate with Sprinkles
Pour leftover melts into a piping bag (or ziploc bag with a corner snipped off). Drizzle over balls one at a time then immediately top each ball with sprinkles.
Step 15: Final Chill
Return cake balls to refrigerator for another 15 minutes to allow coating to finish setting.
Step 16: Serve
Keep refrigerated until ready to serve. Enjoy your delicious Red, White, and Blue Cake Balls!
How to Serve Red, White, and Blue Cake Balls
These delightful Red, White, and Blue Cake Balls are perfect for any festive occasion. Here are some creative serving suggestions to enhance your celebration.
Festive Platter
- Arrange the cake balls on a colorful platter for a festive look. Add some fresh fruits or flowers around them for an extra pop.
Individual Cups
- Serve each cake ball in a small paper cup. This makes for easy grabbing and adds a fun touch to your dessert table.
Ice Cream Pairing
- Pair the cake balls with a scoop of vanilla or strawberry ice cream. The cold creaminess complements the sweet flavors perfectly.
Dessert Table Feature
- Include the cake balls as a highlight on your dessert table. Surround them with other themed treats for an eye-catching display.
Gift Boxes
- Package the cake balls in decorative boxes as party favors. Guests will love taking home this sweet treat!
How to Perfect Red, White, and Blue Cake Balls
For the best results when making Red, White, and Blue Cake Balls, follow these helpful tips.
- Use Room Temperature Ingredients: Ensure your cream cheese is at room temperature for easier mixing, which helps achieve that creamy texture.
- Don’t Overmix the Batter: Mix just until combined to keep your cake light and fluffy. Overmixing can lead to dense cake balls.
- Chill Before Dipping: Refrigerate the formed cake balls before dipping in chocolate. This helps maintain their shape during coating.
- Melt Chocolate Slowly: Use short intervals when melting chocolate in the microwave. Stir often to avoid burning it.
- Decorate Immediately: Once dipped in chocolate, add sprinkles right away before the coating sets to ensure they stick well.
- Experiment with Colors: Feel free to mix different shades of red and blue for a fun visual effect that makes your cake balls stand out even more.
Best Side Dishes for Red, White, and Blue Cake Balls
Serving side dishes with Red, White, and Blue Cake Balls can elevate your holiday gathering. Here are some great options:
- Fruit Salad: A mix of seasonal berries provides freshness and balances the sweetness of the cake balls.
- Patriotic Parfaits: Layer yogurt with strawberries and blueberries in clear cups for a colorful treat that pairs well with cake balls.
- Cheese Platter: Offer assorted cheeses with crackers; this savory option contrasts beautifully with the sweet desserts.
- Veggie Tray: Crisp veggies paired with a ranch dip provide a crunchy snack option that complements your dessert spread nicely.
- Mini Sandwiches: Include small sandwiches filled with turkey or ham; they offer a savory bite against the sweet flavors of the cake balls.
- Lemonade Pitcher: A refreshing lemonade is perfect for quenching thirst while enjoying sweet treats on warm days.
- Ice Cream Bar: Set up an ice cream station where guests can create their own sundaes alongside your cake balls for added fun!
Common Mistakes to Avoid
Making Red, White, and Blue Cake Balls can be fun, but there are some common pitfalls to watch out for.
- Not measuring ingredients properly: Accurate measurements ensure your cake balls have the right texture. Always use a scale or measuring cups for precision.
- Overmixing the batter: Mixing too much can lead to dense cake. Mix just until combined for light and fluffy cake layers.
- Skipping the chilling step: Chilling the cake balls is crucial for maintaining their shape during dipping. Don’t skip this step or you may end up with melted messes.
- Using cold cream cheese: Softened cream cheese mixes more smoothly with crumbled cake. Make sure it’s at room temperature before mixing.
- Not using enough food coloring: To achieve vibrant layers, add food coloring until you reach your desired shade. Test with small amounts first for best results.
Storage & Reheating Instructions
Refrigerator Storage
- Store in an airtight container to maintain freshness.
- They will last up to 5 days in the refrigerator.
- Keep them away from strong-smelling foods to avoid flavor transfer.
Freezing Red, White, and Blue Cake Balls
- Freeze cake balls in a single layer on a baking sheet before transferring them to an airtight container.
- They can be frozen for up to 3 months.
- Label containers with the date for easy tracking.
Reheating Red, White, and Blue Cake Balls
- Oven: Preheat to 350°F and place cake balls on a baking sheet for about 5-10 minutes until warmed through.
- Microwave: Heat individually on a microwave-safe plate in 10-15 second intervals until soft.
- Stovetop: Use a skillet over low heat; cover it to warm them gently without drying out.
Frequently Asked Questions
Can I customize my Red, White, and Blue Cake Balls?
Absolutely! You can change the colors and sprinkles based on different holidays or themes. Get creative!
How do I make these cake balls gluten-free?
Simply use a gluten-free cake mix instead of regular white cake mix. The rest of the recipe remains the same.
What can I use instead of cream cheese?
For a dairy-free option, try using vegan cream cheese or Greek yogurt as a substitute.
How long do Red, White, and Blue Cake Balls last?
When stored properly in the fridge, they can last up to 5 days. If frozen, they can stay good for about 3 months.
Final Thoughts
Red, White, and Blue Cake Balls are not only visually appealing but also deliciously versatile. You can easily customize them for any occasion by adjusting colors and toppings. Encourage your creativity by trying different flavors or fillings within the cake balls. Enjoy making these delightful treats for friends and family!
Red, White, and Blue Cake Balls
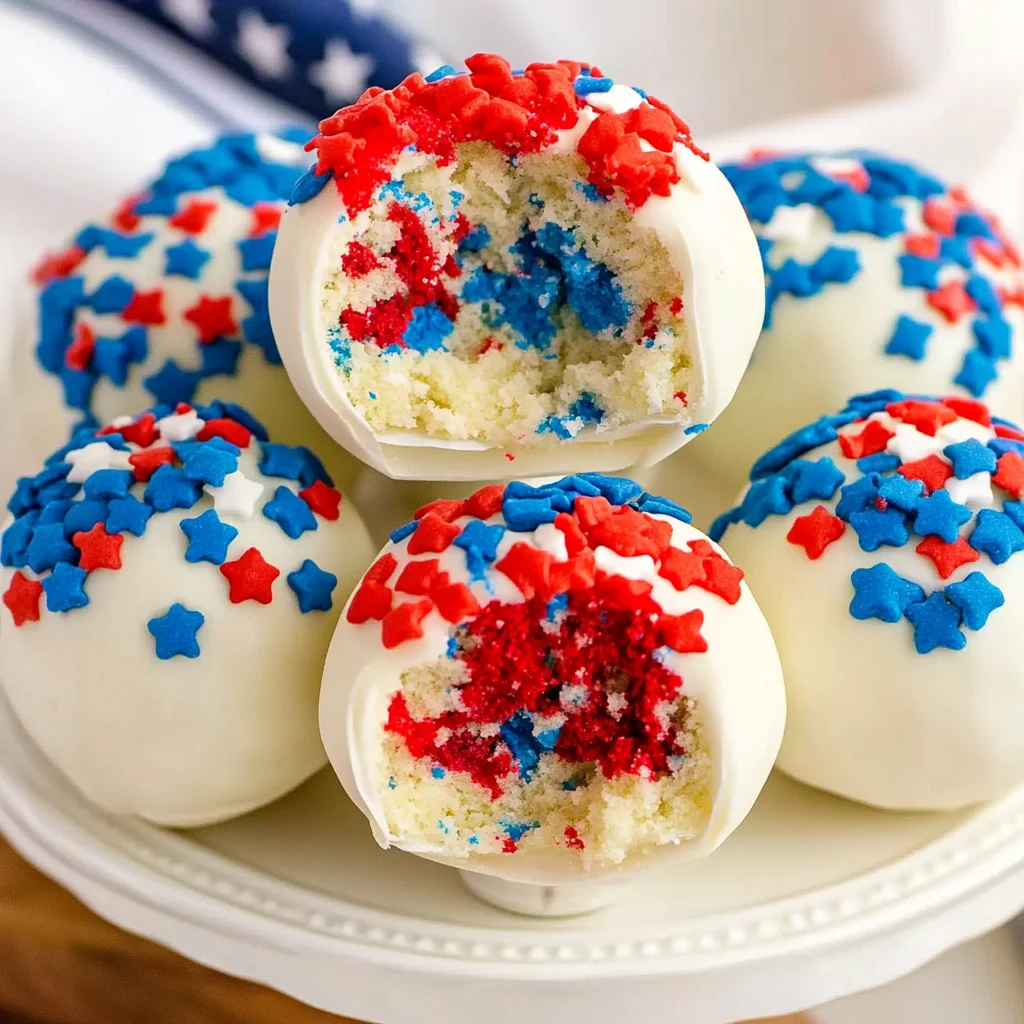
Red, White, and Blue Cake Balls are the ultimate festive treat for any celebration, especially during holidays like the Fourth of July or Memorial Day. These bite-sized delights feature a creamy, rich interior made from fluffy cake and cream cheese, all encased in a sweet white chocolate coating. With their vibrant colors and eye-catching appearance, they are sure to impress guests at your next gathering. Easy to make and customize, these cake balls can be enjoyed by bakers of all skill levels. Serve them on a colorful platter or as part of a dessert table for a fun, patriotic touch that everyone will adore.
- Prep Time: 30 minutes
- Cook Time: 16 minutes
- Total Time: 46 minutes
- Yield: Makes approximately 24 cake pops 1x
- Category: Dessert
- Method: Baking
- Cuisine: American
Ingredients
- 1 (15.25 oz) white cake mix (plus ingredients on the box)
- Red and blue food coloring
- 1 (8 oz) block cream cheese (softened)
- 1 (10 oz) package white melting chocolate
- Red, white, and blue sprinkles
Instructions
- Preheat the oven to 350°F and lightly grease 3 small baking pans.
- Prepare the cake mix according to package instructions.
- Divide the batter into three bowls: leave one plain, color one red, and color one blue.
- Bake each colored batter for 14-16 minutes until a toothpick comes out clean.
- Cool cakes completely before crumbling into separate bowls.
- Beat softened cream cheese until smooth; mix with each bowl of crumbled cake.
- Form mixture into one-inch balls and chill for 1-2 hours.
- Melt white chocolate; dip each ball using a fork.
- Decorate with sprinkles before chilling again for 15 minutes.
Nutrition
- Serving Size: 1 serving
- Calories: 150
- Sugar: 12g
- Sodium: 60mg
- Fat: 7g
- Saturated Fat: 4g
- Unsaturated Fat: 2g
- Trans Fat: 0g
- Carbohydrates: 18g
- Fiber: 0g
- Protein: 2g
- Cholesterol: 15mg
Leave a Comment