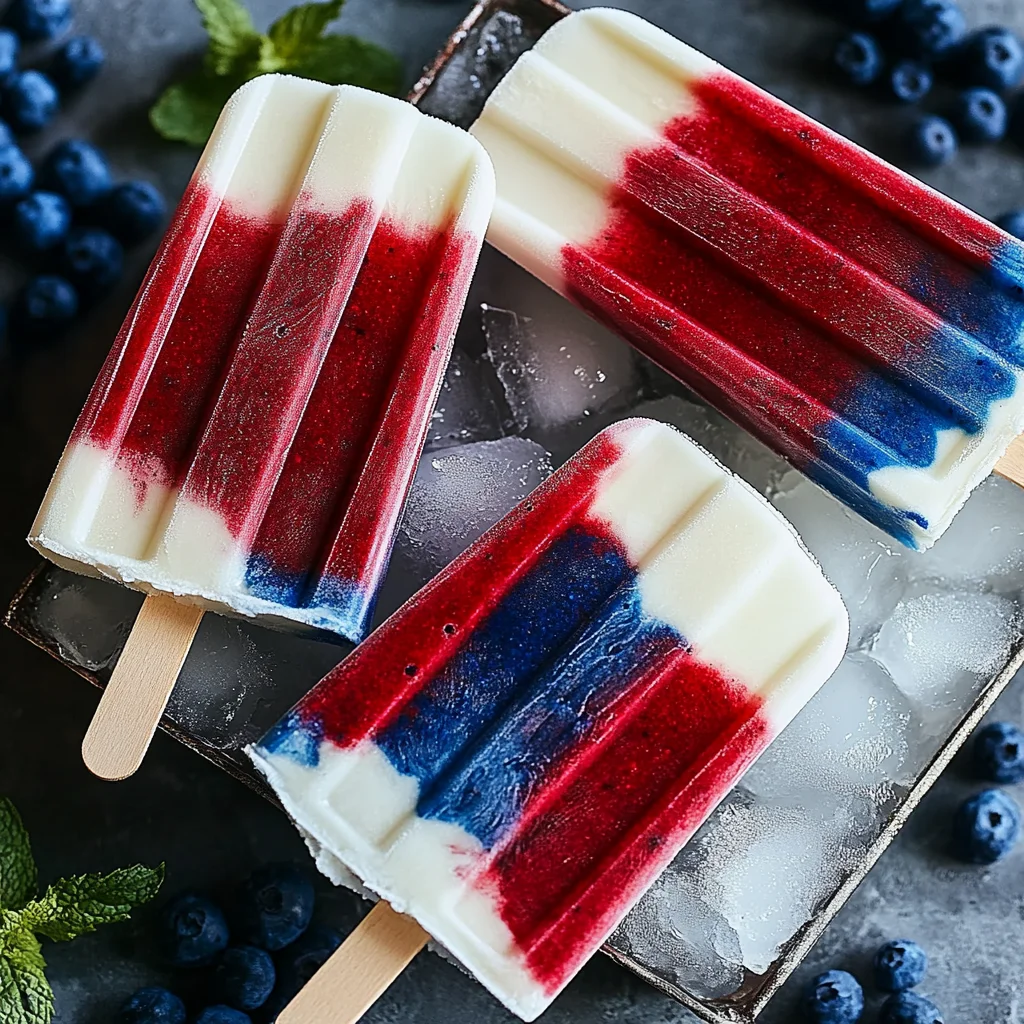
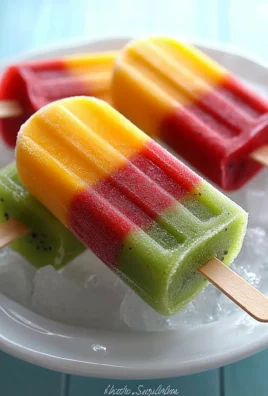
Indulge in the vibrant flavors of summer with these delightful Red White and Blue Popsicles! Perfect for celebrations like the Fourth of July, these layered treats offer a refreshing and healthy alternative to traditional frozen desserts. With their stunning colors and natural ingredients, they are not only delicious but also a feast for the eyes.
Why You’ll Love This Recipe
- Refreshing Taste: The combination of raspberries and coconut milk creates a creamy yet fruity popsicle that’s perfect for hot days.
- Healthy Ingredients: Made from whole fruits and coconut milk, these popsicles are a nutritious treat that everyone can enjoy.
- Easy to Make: With just a few simple steps, you can whip up these colorful popsicles without any fuss.
- Customizable Flavors: Feel free to adjust sweetness or swap out fruits based on what you have on hand.
- Perfect for Celebrations: Their festive colors make them ideal for holidays, BBQs, or any summer gathering.
Tools and Preparation
Before diving into this delicious recipe, gather your necessary tools. Having the right equipment will make preparation smooth and easy.
Essential Tools and Equipment
- Ice pop molds
- Blender
- Measuring cups
- Spoon or spatula
Importance of Each Tool
- Ice pop molds: These are essential for shaping your popsicles and creating beautiful layers.
- Blender: A good blender ensures smooth mixtures, making it easy to blend fruits with coconut milk.
Ingredients
Here’s what you’ll need to create your own Red White and Blue Popsicles:
- 1 cup raspberries
- 1 cup canned coconut milk
- ¼ tsp blue spirulina powder
- Optional: maple syrup for sweetness
- Optional: blueberries for added flavor
How to Make Red White and Blue Popsicles
Step 1: Prepare the Raspberry Layer
- Blend raspberries with optional maple syrup and a little water until smooth.
- Pour the mixture into ice pop molds (about 1 ½ tablespoons each) and freeze for at least 30 minutes.
Step 2: Create the Coconut Layer
- Rinse the blender thoroughly before using it again.
- Mix coconut milk with optional maple syrup until smooth.
- Add this mixture on top of the frozen raspberry layer (heaping 1 – 1 ½ tablespoons each) and freeze for at least 2 hours.
Step 3: Add the Blue Spirulina Layer
- Blend more coconut milk, along with blue spirulina powder, and optional maple syrup, until smooth.
- Pour this mixture over the set white layer. Insert popsicle sticks into each mold.
- Freeze until firm (about 5 hours).
Step 4: Serve Your Popsicles
- To serve, run the molds under warm water for easy removal. Enjoy your refreshing Red White and Blue Popsicles!
These delightful treats are sure to be a hit at any summer gathering!
How to Serve Red White and Blue Popsicles
Serving Red White and Blue Popsicles is a fun way to add color and flavor to your summer gatherings. These popsicles not only delight the taste buds but also bring a festive touch to any celebration.
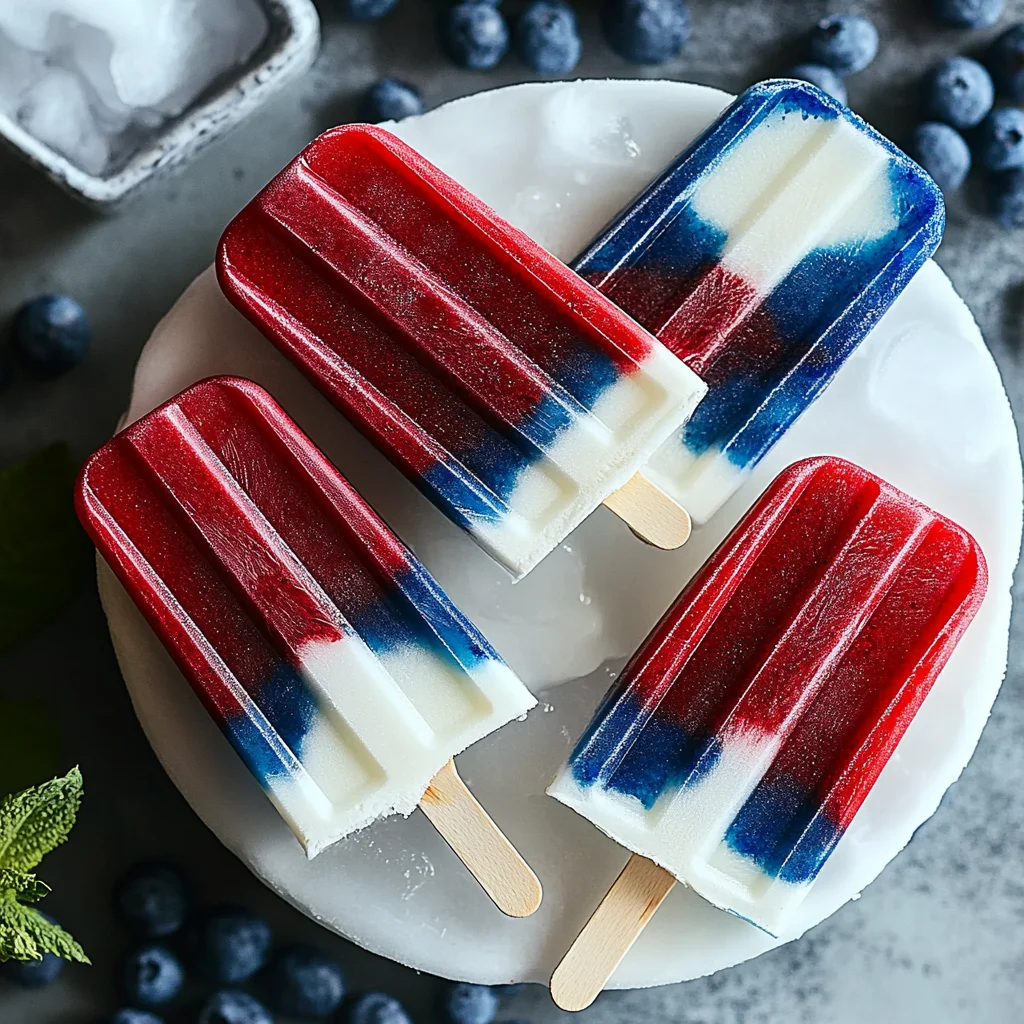
Festive Plate Presentation
- Arrange the popsicles on a colorful platter for a vibrant display. Adding fresh fruit or mint leaves around them enhances the visual appeal.
Perfect for Picnics
- Take these popsicles along for a picnic. They are refreshing and can be enjoyed after savoring savory snacks, making them a perfect dessert option.
Kid-Friendly Treats
- Hand out these popsicles to kids during playdates or birthday parties. Their bright colors make them irresistible, ensuring happy faces all around.
Pair with Fresh Fruit
- Serve alongside a bowl of mixed berries or tropical fruits. This pairing adds extra flavor and nutrients, complementing the popsicle experience.
Make Your Own Sundae Bar
- Set up a sundae station with toppings like whipped cream, nuts, and chocolate sauce. Guests can dip their popsicles in the toppings, creating their custom treats.
Enjoy with Sparkling Water
- Serve these popsicles with sparkling water infused with citrus slices. This refreshing drink complements the sweet flavors of the popsicles beautifully.
How to Perfect Red White and Blue Popsicles
Creating the perfect Red White and Blue Popsicles requires attention to detail. Follow these tips to ensure your frozen treats are both delicious and visually stunning.
- Layer Carefully: Ensure each layer is completely frozen before adding the next one. This helps maintain distinct colors and flavors.
- Adjust Sweetness: Taste each layer before freezing. Feel free to add more maple syrup based on your sweetness preference.
- Use High-Quality Ingredients: Opt for fresh raspberries and organic coconut milk for the best flavor and nutrition in your popsicles.
- Experiment with Flavors: Try substituting different fruits or flavors in place of raspberries or blueberries for unique variations that suit your taste.
- Choose Proper Molds: Use sturdy ice pop molds that allow easy removal once frozen, ensuring you can enjoy your creations without hassle.
- Be Patient: Allow enough freezing time between layers and before serving. Waiting ensures that each layer sets properly for a perfect pop.
Best Side Dishes for Red White and Blue Popsicles
These Red White and Blue Popsicles can be complemented by various side dishes that enhance your summer gathering’s experience. Here are some delightful options:
- Watermelon Salad: A refreshing salad made with diced watermelon, mint, and feta cheese that pairs well with sweet desserts.
- Grilled Corn on the Cob: Sweet corn brushed with butter and seasonings adds a savory contrast to fruity desserts.
- Caprese Skewers: Cherry tomatoes, mozzarella balls, and basil drizzled with balsamic glaze make for an elegant side.
- Potato Salad: A classic dish that offers creamy textures which balance out the lightness of popsicles.
- Veggie Platter: Crisp vegetables served with hummus or ranch dip provide crunch alongside sweet treats.
- Cheese Board: An assortment of cheeses, crackers, and nuts creates a sophisticated snacking option during summer gatherings.
- Fruit Smoothies: Blend up seasonal fruits into smoothies as a refreshing beverage option that complements your popsicles nicely.
- Mini Quiches: Bite-sized quiches filled with veggies or cheese offer savory bites that contrast well with sweet desserts.
Common Mistakes to Avoid
It’s easy to make mistakes when preparing your Red White and Blue Popsicles. Here are some common errors and how to avoid them.
- Skipping the Freezing Time: If you don’t allow each layer to freeze completely before adding the next, the colors will blend together. Make sure each layer is fully frozen for at least 30 minutes to 2 hours, depending on the layer.
- Using Overripe Fruit: Overripe raspberries can alter the flavor and texture of your popsicles. Always choose fresh, firm fruit for the best results.
- Neglecting Sweetness Adjustments: Not all fruits are equally sweet. If your raspberries taste tart, consider adding more maple syrup or choose sweeter fruits like strawberries for your layers.
- Choosing Inappropriate Molds: Using molds that are too small may lead to uneven layers. Select molds that allow for at least 1 ½ tablespoons of each mixture per layer for a balanced look.
- Not Blending Thoroughly: If you don’t blend the coconut milk or blue spirulina well enough, you may end up with clumps in your popsicles. Blend until smooth to achieve a creamy texture.
Refrigerator Storage
- Store leftover popsicles in an airtight container in the refrigerator for up to 3 days.
- Ensure they’re covered properly to prevent freezer burn.
Freezing Red White and Blue Popsicles
- You can keep these popsicles in the freezer for up to 2 months.
- Place them in a freezer-safe bag or container; label with the date for easy tracking.
Reheating Red White and Blue Popsicles
- Oven: Preheat to 350°F (175°C) and warm for about 5-10 minutes if needed. However, these treats are best enjoyed frozen!
- Microwave: Use defrost settings for about 10 seconds at a time until they soften slightly. Be careful not to melt them.
- Stovetop: This method isn’t suitable as it will completely melt your popsicles. Enjoy them cold!
Frequently Asked Questions
How long do Red White and Blue Popsicles last?
These popsicles can be stored in the freezer for up to 2 months without losing their freshness or flavor.
Can I use different fruits in my Red White and Blue Popsicles?
Absolutely! Feel free to customize with other fruits such as strawberries or kiwi for different flavors while maintaining the patriotic color scheme.
What is blue spirulina powder used for?
Blue spirulina powder adds both color and health benefits, including antioxidants. It’s an excellent choice for enhancing both visual appeal and nutritional content in your popsicles.
How can I make these Red White and Blue Popsicles vegan?
This recipe is already vegan-friendly! The coconut milk serves as a dairy-free base, making it perfect for plant-based diets.
Final Thoughts
These Red White and Blue Popsicles are not only a festive treat but also a healthy alternative to traditional desserts. Their vibrant layers make them visually stunning, while the refreshing flavors provide a perfect way to cool down on hot summer days. Customize your popsicles with different fruits or adjust sweetness levels according to your taste preferences!
Red White and Blue Popsicles
Indulge in the refreshing taste of summer with these Red White and Blue Popsicles! Perfect for festive occasions like the Fourth of July, these eye-catching frozen treats are made with wholesome ingredients, including fresh raspberries and creamy coconut milk. Each layered popsicle bursts with vibrant colors and flavors while offering a healthier alternative to traditional desserts. Easy to make and customizable, these popsicles are not only delightful to eat but also make a stunning centerpiece for any summer gathering.
- Prep Time: 15 minutes
- Cook Time: 30 minutes (plus freezing time)
- Total Time: 45 minutes
- Yield: Makes approximately 6 popsicles 1x
- Category: Dessert
- Method: Freezing
- Cuisine: American
Ingredients
- 1 cup raspberries
- 1 cup canned coconut milk
- ¼ tsp blue spirulina powder
- Maple syrup (optional, for sweetness)
- Blueberries (optional, for added flavor)
Instructions
- Prepare the Raspberry Layer: Blend raspberries with optional maple syrup until smooth. Pour into ice pop molds and freeze for at least 30 minutes.
- Create the Coconut Layer: Rinse the blender and mix coconut milk with optional maple syrup until smooth. Pour over the frozen raspberry layer and freeze for 2 hours.
- Add the Blue Spirulina Layer: Blend coconut milk with blue spirulina powder and optional maple syrup until smooth. Pour over the white layer, insert popsicle sticks, and freeze until firm (about 5 hours).
- Serve: Run molds under warm water to remove popsicles easily.
Nutrition
- Serving Size: 1 popsicle
- Calories: 60
- Sugar: 10g
- Sodium: 5mg
- Fat: 3g
- Saturated Fat: 2g
- Unsaturated Fat: 1g
- Trans Fat: 0g
- Carbohydrates: 9g
- Fiber: 1g
- Protein: 1g
- Cholesterol: 0mg
Leave a Comment