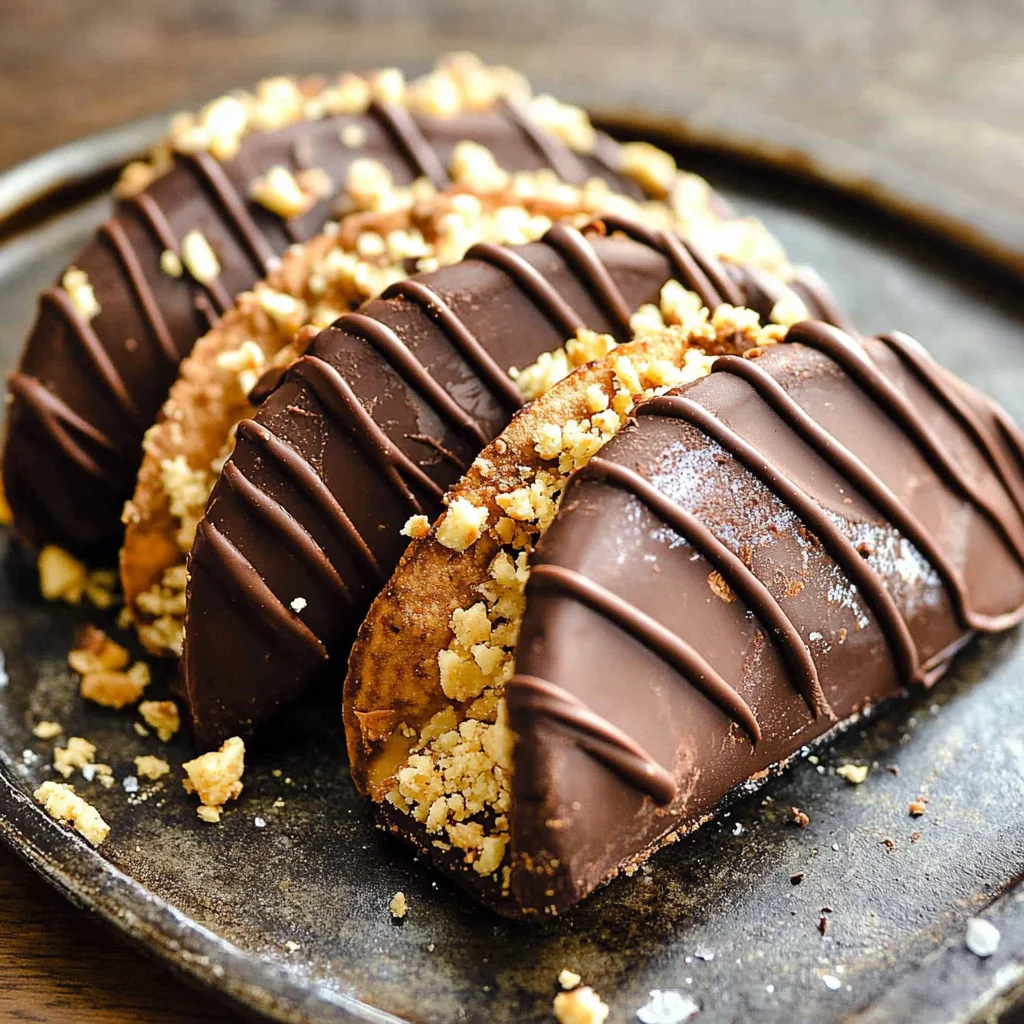
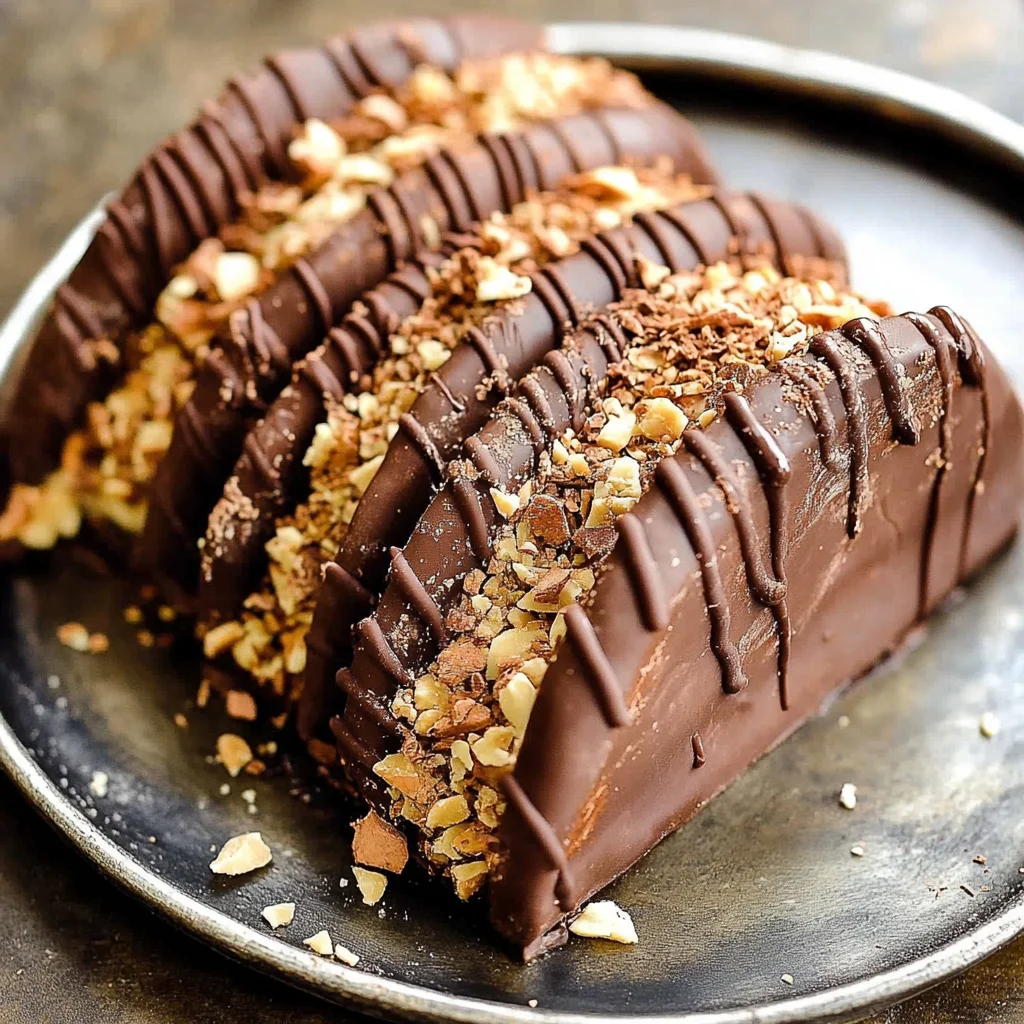
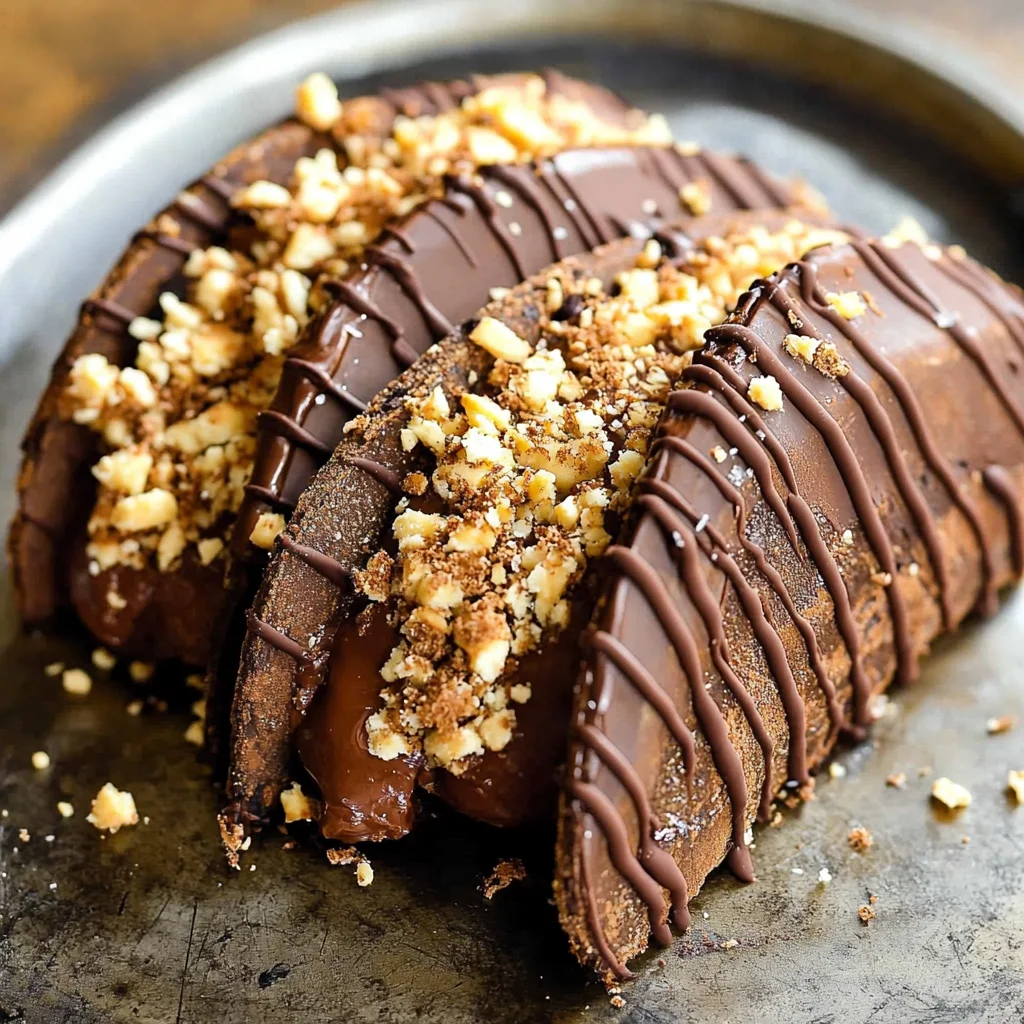
Making your own Homemade Choco Taco Tutorial is a delightful way to enjoy a classic treat. Perfect for summer gatherings, birthday parties, or simply as a fun dessert at home, these choco tacos combine a crispy chocolate waffle cone with creamy ice cream. Dipped in chocolate and topped with crunchy peanuts, they are sure to impress everyone.
Why You’ll Love This Recipe
- Easy to Make: With simple ingredients and straightforward steps, you can whip up these choco tacos without any fuss.
- Customizable Flavors: Use any ice cream flavor you love—experiment with chocolate, vanilla, or fruity options!
- Fun for All Ages: Kids and adults alike will enjoy creating their own unique choco tacos.
- Perfect for Sharing: This recipe yields 14 tacos, making it ideal for gatherings or family treats.
- Deliciously Decadent: The combination of chocolate waffles, creamy ice cream, and crunchy peanuts creates an irresistible dessert experience.
Tools and Preparation
To make your homemade choco tacos successfully, a few essential tools will streamline the process.
Essential Tools and Equipment
- Waffle cone maker
- Mixing bowl
- Whisk
- Measuring cups and spoons
- Baking rack
Importance of Each Tool
- Waffle cone maker: This tool is crucial for creating the perfect taco shell shape that holds the ice cream beautifully.
- Mixing bowl: A sturdy mixing bowl ensures all your ingredients are combined smoothly without mess.
Ingredients
For the Chocolate Waffle Cone
- 1 C granulated sugar
- 4 lrg egg whites
- 1 tsp vanilla
- 1/4 tsp salt
- 4 Tbsp butter melted
- 6 Tbsp unsweetened cocoa powder
- 11 Tbsp all-purpose flour
For the Ice Cream Filling
- 1 gallon Ice cream – any flavor (softened)
For the Coating
- 16 oz Chocolate wafers
- 1 1/2 C Chopped peanuts
How to Make Homemade Choco Taco Tutorial
Step 1: Mix the Waffle Ingredients
Combine all the chocolate waffle ingredients in a mixing bowl. Use a whisk to blend until smooth.
Step 2: Prepare the Waffle Cone Maker
Preheat your waffle cone maker according to the manufacturer’s instructions.
Step 3: Cook the Waffle Shells
Pipe about 2–3 tablespoons of batter into the waffle cone maker. Cook for approximately 40–45 seconds on medium heat.
Step 4: Shape the Taco Shells
Once cooked, gently hang each shell on a rack to cool in taco shell form.
Step 5: Soften the Ice Cream
While shells cool, soften your chosen ice cream flavor by stirring it until consistent throughout.
Step 6: Fill the Taco Shells
Scoop softened ice cream into each cooled taco shell. Place them back into the freezer to firm up.
Step 7: Prepare for Dipping
Work with only 2–3 tacos at a time to prevent melting and sogginess in the shells.
Step 8: Melt Chocolate Wafers
Melt chocolate wafers in a microwave-safe bowl until smooth. Let it cool slightly before dipping.
Step 9: Dip in Chocolate
Dip the open side of each filled taco into the melted chocolate until fully covered.
Step 10: Add Peanuts
Immediately dip each chocolate-covered taco into chopped peanuts for an extra crunch.
Final Step: Freeze Until Ready
Keep your homemade choco tacos frozen until you’re ready to serve them! Enjoy this delicious treat with family and friends.
How to Serve Homemade Choco Taco Tutorial
Serving your homemade choco tacos can be a delightful experience, especially during summer gatherings or family get-togethers. Here are some creative ways to enjoy this sweet treat.
Fun Party Platter
- Arrange several choco tacos in a colorful platter for a visually appealing dessert option at parties.
Ice Cream Bar
- Set up an ice cream bar with various toppings alongside the choco tacos. Guests can build their own dessert creations!
Individual Servings
- Serve each taco on its own plate with a drizzle of chocolate sauce for an elegant touch.
Kids’ Birthday Treats
- These delightful treats make perfect party favors for kids’ birthdays. Package them in fun wrappers for a festive look.
Movie Night Snacks
- Pair these choco tacos with popcorn and drinks for a cozy movie night at home.
Summer Picnic Delight
- Pack these tacos in cooler bags for a refreshing dessert during outdoor picnics.
How to Perfect Homemade Choco Taco Tutorial
Perfecting your homemade choco tacos can elevate your dessert game. Here are some handy tips to ensure they turn out amazing every time.
- Use fresh ingredients: Always opt for high-quality ice cream and fresh eggs for the best flavor.
- Keep ice cream softened: Make sure your ice cream is softened but not melted to create easy scooping without soggy shells.
- Work quickly: Assemble your tacos quickly to prevent the ice cream from melting and making the waffle soggy.
- Experiment with flavors: Try different ice cream flavors or add mix-ins like chocolate chips or fruit for variety.
- Store properly: Keep assembled choco tacos in an airtight container in the freezer to maintain their texture.
- Prep ahead: You can make the waffle shells in advance and store them until you’re ready to assemble the tacos.
Best Side Dishes for Homemade Choco Taco Tutorial
Complementing your homemade choco tacos with delicious side dishes can enhance your dessert experience. Here are some ideas that pair nicely.
- Fruit Salad: A refreshing mix of fruits adds brightness and balances the sweetness of the choco tacos.
- Whipped Cream: Light and fluffy, whipped cream can be served alongside as a dip or topping.
- Chocolate Sauce: Drizzle extra chocolate sauce over the tacos or serve it as a dipping option on the side.
- Nuts and Seeds Mix: A crunchy mix of nuts or seeds provides added texture and flavor contrast.
- Mini Brownies: Rich chocolate brownies make a decadent pairing that chocolate lovers will adore.
- Ice Cream Floats: Serve classic soda floats as an additional cool treat that complements the ice cream theme.
Common Mistakes to Avoid
Making homemade choco tacos can be fun, but it’s easy to make some common mistakes. Here are a few to keep in mind.
-
Skipping the cooling step: If you don’t let the waffle shells cool properly, they may become soggy when filled with ice cream. Allow them to hang and cool completely in taco shell form.
-
Using hard ice cream: Starting with ice cream that is too hard can make it difficult to scoop into the waffle shells. Always soften the ice cream first for easier filling.
-
Overfilling the taco shells: Filling your choco tacos too much can lead to messy spills and leaks. Use just enough ice cream to comfortably fit inside without overflowing.
-
Not working in batches: Attempting to make too many tacos at once can cause the ice cream to melt before you get a chance to dip them. Work on 2-3 tacos at a time for best results.
-
Neglecting the chocolate coating: Forgetting to dip the open side of your tacos in melted chocolate can leave your treats unprotected from freezer burn. Make sure to coat them fully before adding peanuts.
Storage & Reheating Instructions
Refrigerator Storage
- Duration: Store homemade choco tacos in the refrigerator for up to 2 hours if needed.
- Container: Use an airtight container to maintain freshness.
Freezing Homemade Choco Taco Tutorial
- Duration: You can freeze these treats for up to 2 months.
- Container: Place tacos in a freezer-safe container or wrap each one tightly in plastic wrap before placing them in a bag.
Reheating Homemade Choco Taco Tutorial
-
Oven: Preheat your oven to 350°F (175°C) and place the frozen choco tacos on a baking sheet for about 5-7 minutes until slightly warmed.
-
Microwave: Use a microwave-safe plate and heat on low power for about 15-20 seconds. Be careful not to melt the ice cream too much.
-
Stovetop: Place tacos on a skillet over low heat for 1-2 minutes, flipping carefully until warmed through without melting.
Frequently Asked Questions
What is the Homemade Choco Taco Tutorial?
The Homemade Choco Taco Tutorial provides step-by-step instructions on how to create delicious choco tacos using homemade chocolate waffle cones filled with ice cream.
Can I customize my homemade choco tacos?
Yes! You can customize your homemade choco tacos by choosing different flavors of ice cream or by adding toppings like sprinkles or caramel sauce.
How do I keep my homemade choco tacos from getting soggy?
To prevent sogginess, ensure that your waffle shells are completely cooled before adding soft ice cream, and work in small batches when assembling them.
What are some good toppings for my choco tacos?
Good toppings include chopped nuts, sprinkles, crushed cookies, or even drizzles of caramel or fudge sauce for added flavor and texture.
How long does it take to make homemade choco tacos?
The total time for making these treats is about 170 minutes, which includes preparation and freezing time.
Final Thoughts
Homemade choco tacos are truly an enjoyable treat perfect for warm summer days. Their versatility allows you to experiment with different flavors and toppings, making it easy to cater this recipe to any taste preference. So why not give this delightful dessert a try? You won’t be disappointed!
Homemade Choco Taco

Indulge in a homemade dessert delight with our Homemade Choco Taco Tutorial! These delicious choco tacos combine crispy chocolate waffle cones filled with your favorite creamy ice cream, all dipped in rich chocolate and sprinkled with crunchy peanuts. Perfect for summer parties or a fun family treat, this recipe allows everyone to customize their own unique flavor combinations. With an easy-to-follow process and minimal ingredients, you can whip up a batch of 14 delightful choco tacos that will impress guests of all ages. Enjoy the ultimate sweet experience that brings joy to any occasion!
- Prep Time: 30 minutes
- Cook Time: 15 minutes
- Total Time: 45 minutes
- Yield: Makes approximately 14 servings (tacos) 1x
- Category: Dessert
- Method: Baking
- Cuisine: American
Ingredients
- 1 cup granulated sugar
- 4 large egg whites
- 1 teaspoon vanilla extract
- 1/4 teaspoon salt
- 4 tablespoons melted butter
- 6 tablespoons unsweetened cocoa powder
- 11 tablespoons all-purpose flour
- 1 gallon softened ice cream (any flavor)
- 16 ounces chocolate wafers
- 1.5 cups chopped peanuts
Instructions
- In a mixing bowl, whisk together sugar, egg whites, vanilla, salt, melted butter, cocoa powder, and flour until smooth.
- Preheat your waffle cone maker as per manufacturer instructions.
- Pour about 2–3 tablespoons of batter into the waffle cone maker and cook for 40–45 seconds.
- Cool each shell hanging to maintain its taco shape.
- Soften your chosen ice cream by stirring until consistent.
- Fill each taco shell with ice cream and freeze for firmness.
- Melt chocolate wafers in a microwave-safe bowl; cool slightly before dipping.
- Dip the open side of each taco into the melted chocolate and then into chopped peanuts.
- Freeze until ready to serve.
Nutrition
- Serving Size: 1 serving
- Calories: 280
- Sugar: 22g
- Sodium: 75mg
- Fat: 12g
- Saturated Fat: 6g
- Unsaturated Fat: 5g
- Trans Fat: 0g
- Carbohydrates: 38g
- Fiber: 2g
- Protein: 4g
- Cholesterol: 30mg

Leave a Comment